Voyager Bluetooth Headset Manual: A Comprehensive Guide
This comprehensive guide unlocks your Plantronics Voyager’s potential, detailing setup, pairing, operation, troubleshooting, maintenance, and advanced features for optimal performance.
Welcome to the world of clear, convenient communication! The Plantronics Voyager Bluetooth headset series is engineered for professionals and individuals seeking reliable, high-quality audio experiences. This manual serves as your essential companion, guiding you through every aspect of your headset – from initial setup and pairing with various devices, to mastering advanced features and resolving common issues.
Understanding your Voyager headset’s capabilities is key to maximizing its benefits. Whether you’re making critical business calls, enjoying music, or utilizing voice assistants, this guide provides the necessary information to customize your experience. We’ll cover troubleshooting tips, maintenance practices, and how to leverage the CoinLedger integration for seamless crypto transaction management. Prepare to unlock the full potential of your Voyager!
Understanding Voyager Models: A Quick Overview
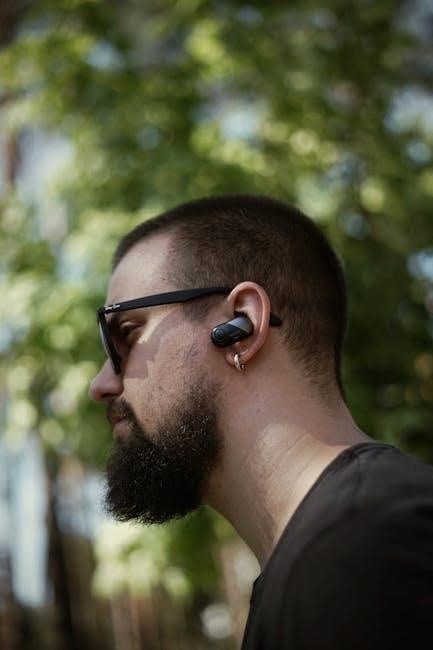
The Voyager family offers diverse options, each tailored to specific needs. Models like the Voyager 5200UC prioritize seamless connectivity with both mobile devices and computers, offering a versatile communication solution. The Voyager Legend, known for its exceptional clarity, focuses on superior call quality and all-day comfort. Other variations may emphasize specific features like enhanced noise cancellation or extended battery life.
This guide provides general instructions applicable to most Voyager headsets, but it’s crucial to consult the specific documentation included with your model for detailed information. Understanding your headset’s unique capabilities ensures optimal performance and allows you to fully leverage its features. Explore the differences to choose the Voyager that best fits your lifestyle.
Setting Up Your Voyager Headset
Proper setup is key to enjoying your Voyager. This section guides you through initial charging, powering on, and pairing with your preferred devices—mobile or computer.
Initial Charging and Powering On
Before first use, fully charge your Voyager headset to ensure optimal performance and battery longevity. Connect the provided charging cable to the headset’s charging port and a USB power source. A solid LED indicator typically signifies charging is in progress.
Charging time varies by model, but generally takes around 1.5 to 2.5 hours for a full charge. Once fully charged, the LED indicator will change—often to a different color or turning off entirely.
To power on the headset, locate the power button (refer to your specific model’s quick start guide for its exact location). Press and hold the power button for a few seconds until an LED illuminates or you hear a power-on tone. The headset is now ready for pairing.
Pairing with Mobile Devices (iOS & Android)
To pair your Voyager headset with a mobile device, first ensure Bluetooth is enabled on your smartphone or tablet. Put the headset into pairing mode – typically by pressing and holding the power button slightly longer than for powering on, until a pairing indicator light flashes.
On iOS or Android, navigate to the Bluetooth settings menu. Your Voyager headset should appear in the list of available devices. Select it to initiate the pairing process. You may be prompted to enter a PIN code (usually “0000” if required), or confirm a pairing request.
Once paired, the headset will connect automatically whenever it’s powered on and within range of your mobile device.
Pairing with Computers (Windows & macOS)
Pairing your Voyager headset with a computer, whether Windows or macOS, follows a similar process to mobile devices. First, put your headset into pairing mode by holding the power button until the indicator light flashes, signaling it’s discoverable.
On Windows, navigate to Settings > Devices > Bluetooth & other devices, and ensure Bluetooth is toggled on. Click “Add Bluetooth or other device” and select Bluetooth. Your Voyager should appear in the list; select it to pair. macOS users can find Bluetooth settings in System Preferences > Bluetooth.
Select your headset and click “Connect.” Once paired, it will automatically reconnect upon powering on.
Using Your Voyager Headset
Master essential controls: answer/end calls, adjust volume, and utilize the mute function for clear communication, alongside seamless voice assistant integration.
Basic Call Controls: Answer, End, and Reject
Answering a call with your Voyager headset is typically achieved by simply pressing the designated call control button. This button’s location varies slightly depending on the specific Voyager model, but it’s usually easily accessible. To end a call, press the same button again – a short press will usually disconnect the current conversation.
Rejecting an incoming call often involves a longer press of the call control button. This action will typically send a busy signal to the caller. Some models may also support rejecting a call by issuing a voice command, depending on the voice assistant integration. Familiarizing yourself with these basic controls ensures effortless call management while maintaining focus and productivity. Refer to your specific model’s manual for precise button locations and functionalities.
Volume Adjustment and Mute Functionality
Adjusting the volume on your Voyager headset is usually straightforward, utilizing dedicated buttons or a rocker switch. These controls allow you to increase or decrease the audio level to your preference, ensuring clear communication and comfortable listening. Muting the microphone is crucial for privacy during calls.
Typically, a dedicated mute button is provided, often indicated by a microphone icon with a line through it. Pressing this button instantly silences your microphone, preventing your voice from being transmitted. Remember to unmute before speaking again! Some models also support voice commands for muting and unmuting. Always confirm mute status via audio prompts or indicator lights.
Voice Assistant Integration (Siri, Google Assistant)
Voyager headsets seamlessly integrate with popular voice assistants like Siri and Google Assistant, enhancing hands-free control. To activate your assistant, typically a multi-function button needs to be pressed and held for a few seconds. The headset will then connect to your paired device and initiate the assistant.
Once activated, you can issue voice commands – make calls, send messages, play music, or get information – without touching your phone. Compatibility may vary depending on your headset model and smartphone operating system. Ensure your device’s voice assistant is enabled in settings for optimal functionality. Check your specific Voyager model’s documentation for precise activation instructions.
Understanding Multi-Device Connectivity
Many Voyager headsets support multi-device connectivity, allowing simultaneous pairing with a smartphone and a computer. This feature enables seamless switching between calls on your phone and audio from your laptop. The headset intelligently detects incoming audio from either device and routes it accordingly.
To utilize this, pair each device separately through the headset’s pairing mode. Once connected, the Voyager will remember both devices. Switching between devices is often automatic, but some models may require manual selection. Be aware that audio prioritization might occur; the last connected device may take precedence. Consult your model’s manual for specific multi-device behavior and configuration options.

Advanced Features & Customization
Explore Voyager’s full potential through customizable audio settings, smart sensors, and voice commands, tailoring the headset to your specific needs and preferences.
Customizing Audio Settings
Personalize your listening experience with Voyager’s adjustable audio settings. Many models allow you to fine-tune the equalizer for optimal sound clarity, boosting bass or treble as desired. Explore options for noise cancellation, adapting to various environments – from bustling offices to windy commutes.
Adjusting the sidetone feature lets you control how much of your own voice you hear during calls, ensuring comfortable conversation levels. Some Voyager headsets offer specialized audio modes for music or voice calls, enhancing specific frequencies for a richer, clearer sound. Utilize the Plantronics Hub software (or the associated mobile app) to access these settings and save custom profiles for different scenarios, maximizing audio quality and comfort.
Utilizing Voyager’s Smart Sensors
Voyager headsets boast intelligent sensors enhancing usability and convenience. Smart sensors detect when the headset is being worn, automatically answering calls as you put it on or pausing audio when removed. Some models feature motion sensors, enabling voice commands with a simple head movement.

These sensors also contribute to battery optimization, powering down the headset when not in use. Explore settings to customize sensor sensitivity and functionality, tailoring the experience to your preferences. Understanding these features allows for hands-free operation and seamless transitions between calls and audio, maximizing productivity and convenience throughout your day.
Exploring Voice Command Capabilities
Voyager headsets offer robust voice command functionality, streamlining operation without manual adjustments. Activate voice assistant integration – Siri or Google Assistant – for hands-free control of calls, music, and information access. Common commands include answering/ending calls, adjusting volume, and redialing contacts.
Explore specific voice commands within your headset’s companion app for a complete list. Ensure your mobile device’s voice assistant is enabled and properly configured for seamless interaction; Utilizing voice commands enhances safety and convenience, particularly while driving or multitasking, allowing you to stay connected effortlessly.
Troubleshooting Common Issues
Resolve connectivity, audio, and battery problems quickly with our guide. We cover pairing failures, static, low volume, microphone malfunctions, and charging concerns.
Headset Not Pairing: Solutions & Steps
Experiencing pairing difficulties with your Voyager headset? First, ensure Bluetooth is enabled on both your headset and the target device. Verify the headset isn’t already connected to another device; disconnect it if it is. Attempt to “forget” or remove the Voyager from the device’s Bluetooth list, then re-pair.
Restart both the headset and the device – a simple reboot often resolves connectivity glitches. Confirm the headset is in pairing mode (consult your model’s specific instructions, often involving holding the power button). Check for software updates for both the headset and the device, as outdated software can cause compatibility issues. Finally, ensure there’s no significant interference from other Bluetooth devices nearby.
Audio Quality Problems: Static, Distortion, or Low Volume
Poor audio quality can stem from several sources. Initially, verify the volume levels on both your Voyager headset and the connected device are appropriately adjusted. Ensure there are no obstructions blocking the microphone or speaker. Try moving away from potential sources of interference, like microwaves or other wireless devices.
Check for software updates for both the headset and the device, as these often include audio enhancements. If using a computer, confirm the correct audio output device is selected. Cleaning the headset’s speaker grill can also improve clarity. If the problem persists, try pairing with a different device to isolate the issue.
Battery Life Issues and Charging Concerns
Reduced battery life can be frustrating. First, ensure you’re using the provided charging cable and adapter. Avoid using USB hubs or computer ports for charging, as they may deliver insufficient power. Confirm the charging port is clean and free of debris. Battery performance degrades over time; consider this if the headset is older.
Extreme temperatures can impact battery life, so avoid leaving the headset in direct sunlight or cold environments. If the headset isn’t charging, try a different power outlet. A full charge cycle (complete discharge followed by a full charge) can sometimes recalibrate the battery indicator.
Microphone Not Working: Troubleshooting Steps
If your Voyager’s microphone isn’t functioning, begin by verifying it isn’t muted – check the physical mute button and software settings on your connected device. Ensure the headset is selected as the default microphone in your device’s audio settings. Try disconnecting and reconnecting the headset to re-establish the audio connection.
Check for physical obstructions like dirt or debris blocking the microphone port. Restarting both the headset and the connected device can often resolve software glitches. If issues persist, try pairing with a different device to isolate the problem. A factory reset might be necessary as a last resort.

Maintenance and Care
Regular cleaning, proper storage, and keeping the software updated will ensure your Voyager headset’s longevity and consistently optimal performance over time.
Cleaning Your Voyager Headset
Maintaining a clean Voyager headset is crucial for hygiene and optimal performance. Regularly wipe down the ear cushions and exterior surfaces with a soft, slightly damp cloth. Avoid using abrasive cleaners or solvents, as these can damage the materials. For stubborn grime, a small amount of mild soap can be used on the cloth, ensuring it’s not directly applied to the headset.
Pay particular attention to the microphone area, as buildup can affect audio clarity. Gently clean around the microphone port with a dry cotton swab; Ensure the headset is completely dry before use or charging. Consistent cleaning not only extends the lifespan of your Voyager but also contributes to a more pleasant and hygienic user experience. Remember to disconnect the headset from any power source before cleaning.
Storing Your Headset Properly
Proper storage significantly extends the life of your Voyager Bluetooth headset. When not in use, store the headset in a cool, dry place, away from direct sunlight and extreme temperatures. Utilizing the provided carrying case, if available, offers excellent protection against dust and physical damage. Avoid storing the headset in areas with high humidity, as this can corrode internal components.
Do not coil the charging cable tightly, as this can cause internal damage over time. Instead, loosely loop the cable for storage; Avoid placing heavy objects on top of the headset, which could cause deformation or breakage. Following these simple storage guidelines will ensure your Voyager remains in optimal condition for years to come, preserving its functionality and performance.
Software Updates and Firmware
Keeping your Voyager headset’s software and firmware updated is crucial for optimal performance and access to the latest features. Manufacturers regularly release updates that address bugs, improve audio quality, and enhance compatibility with devices. Check the Plantronics (now Poly) support website or the Voyager companion app for available updates.
The update process typically involves connecting your headset to a computer via USB and using the provided software. Always follow the on-screen instructions carefully during the update process, and avoid interrupting the update to prevent potential damage. Regularly checking for updates ensures your headset benefits from the latest improvements and maintains peak functionality, extending its lifespan and user experience.

Voyager and Crypto Transactions (CoinLedger Integration)
Voyager partners with CoinLedger, allowing users to download crypto transaction history as a CSV file for simplified tax reporting and account linking.
Downloading Voyager Crypto Transactions as CSV
To access your Voyager crypto transaction data in a CSV format, begin by navigating to the CoinLedger platform. Ensure you either have an existing account or create a new one; crucially, use the same email address associated with your Voyager account for seamless integration.
Once logged into CoinLedger, carefully follow the on-screen prompts designed to link your Voyager and CoinLedger accounts. This connection enables the straightforward download of your complete transaction history. The CSV file provides a readily usable format for tax preparation or portfolio tracking purposes, streamlining your cryptocurrency accounting processes. This integration simplifies managing your digital asset records.
Linking Voyager and CoinLedger Accounts
Establishing a connection between your Voyager and CoinLedger accounts is a straightforward process designed to simplify your cryptocurrency tax reporting. After logging into your CoinLedger account – remembering to use the same email address as your Voyager account – you’ll be guided through a series of on-screen instructions.
These prompts initiate a secure authorization process, allowing CoinLedger to access your Voyager transaction history. This linkage enables automated import of your trading data, eliminating manual entry and reducing the risk of errors. Successful linking unlocks features like capital gains calculations and tax form generation, making crypto tax season significantly easier to manage.

Resetting Your Voyager Headset
Reset options range from a simple soft reset to a complete factory reset, addressing minor glitches or preparing the device for a new user configuration.
Performing a Soft Reset
A soft reset is the first troubleshooting step for minor Voyager Bluetooth headset issues. This process doesn’t erase any personalized settings or paired device information, making it a safe and quick solution. Typically, a soft reset involves a simple power cycle.
To perform a soft reset, locate the power button on your Voyager headset. Press and hold the power button for approximately 10-15 seconds. You may observe the indicator lights flashing or the headset briefly powering off and then on again.
Release the power button once you notice the headset restarting. Allow a few moments for the device to fully reboot and reconnect to any previously paired devices; This simple procedure often resolves temporary software glitches and restores normal functionality.
Factory Reset: When and How to Do It
A factory reset restores your Voyager headset to its original, out-of-the-box settings, erasing all pairings and customizations. This is useful when experiencing persistent issues a soft reset can’t resolve, or when preparing to sell or give away the headset.
The process varies by model, so consult your specific Voyager manual. Generally, it involves holding a combination of buttons (often power and volume) for an extended period – typically 15-30 seconds – until indicator lights signal the reset.
Be aware: a factory reset will require you to re-pair the headset with all your devices and reconfigure any personalized settings. After the reset, proceed with the initial setup and pairing process as described in the manual.