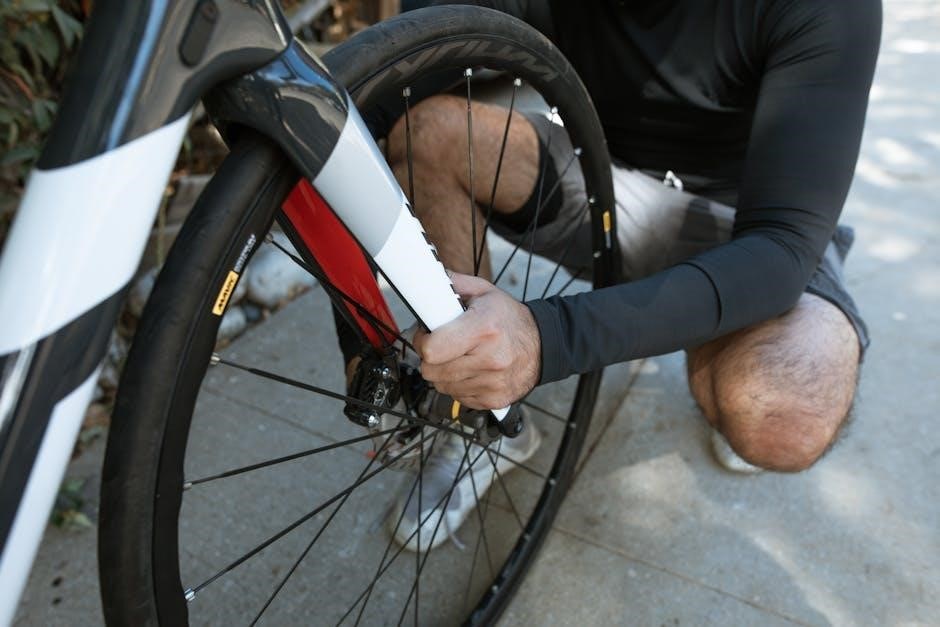
The Harley Rear Wheel Assembly Diagram is a detailed visual guide illustrating components and their relationships. It aids in understanding assembly‚ disassembly‚ and maintenance‚ ensuring proper bike function.
1.1 Definition of Harley Rear Wheel Assembly Diagram
The Harley Rear Wheel Assembly Diagram is a detailed visual representation of the rear wheel components‚ showcasing how they are structured and interconnected. This diagram serves as a critical resource for understanding the assembly‚ disassembly‚ and maintenance of the rear wheel system. It provides a clear‚ exploded view of parts such as the hub‚ wheel‚ brake rotor‚ bearings‚ and associated hardware. By illustrating each component’s position and relationship‚ the diagram simplifies complex assembly processes. It is an essential tool for mechanics and DIY enthusiasts‚ offering step-by-step guidance for repairs‚ customizations‚ and regular maintenance. The diagram ensures that users can identify and address issues efficiently‚ making it indispensable for anyone working on their Harley-Davidson motorcycle.
1.2 Importance of the Diagram for Maintenance and Repairs
The Harley Rear Wheel Assembly Diagram is indispensable for maintaining and repairing the rear wheel system. It provides a clear visual reference‚ enabling users to identify components‚ understand their relationships‚ and diagnose issues accurately. This diagram is crucial for ensuring proper assembly and alignment‚ which are vital for safety and performance. It helps prevent errors during repairs‚ reducing the risk of damage to critical parts. Regular maintenance‚ such as cleaning‚ lubricating‚ and inspecting components‚ becomes more efficient with the diagram as a guide. By following the diagram‚ users can restore their Harley to optimal condition‚ ensuring reliability and longevity. It is an essential tool for both professional mechanics and DIY enthusiasts‚ saving time and reducing costs associated with trial-and-error methods.

Key Components of the Rear Wheel Assembly
The rear wheel assembly comprises the hub‚ wheel‚ brake rotor‚ bearings‚ sprocket‚ and axle. These components work together to ensure stability‚ braking efficiency‚ and smooth power transmission.
2.1 Hub and Wheel Structure
The hub is the central component of the rear wheel‚ housing the bearings and connecting to the axle. The wheel is securely attached to the hub‚ ensuring proper alignment. Together‚ they provide a stable platform for the tire and brake rotor. The hub’s design allows for smooth rotation‚ while the wheel’s durability ensures long-lasting performance. Proper installation and alignment of these parts are crucial for safety and efficiency. Regular inspection and maintenance are recommended to prevent wear and tear‚ ensuring optimal functionality.
2.2 Brake Rotor and Bearings
The brake rotor is mounted directly to the hub‚ playing a critical role in the bike’s braking system. Its smooth surface ensures consistent stopping power. Bearings are essential for allowing the wheel to rotate freely and efficiently. Proper lubrication and alignment of these components are vital for optimal performance and safety. Regular inspection for wear or damage is recommended to prevent premature failure. The brake rotor’s condition directly impacts braking effectiveness‚ while bearings ensure smooth rotation and minimize friction. Both components must be handled with care during assembly to avoid damage. Their proper installation and maintenance are crucial for ensuring the bike’s overall functionality and rider safety.

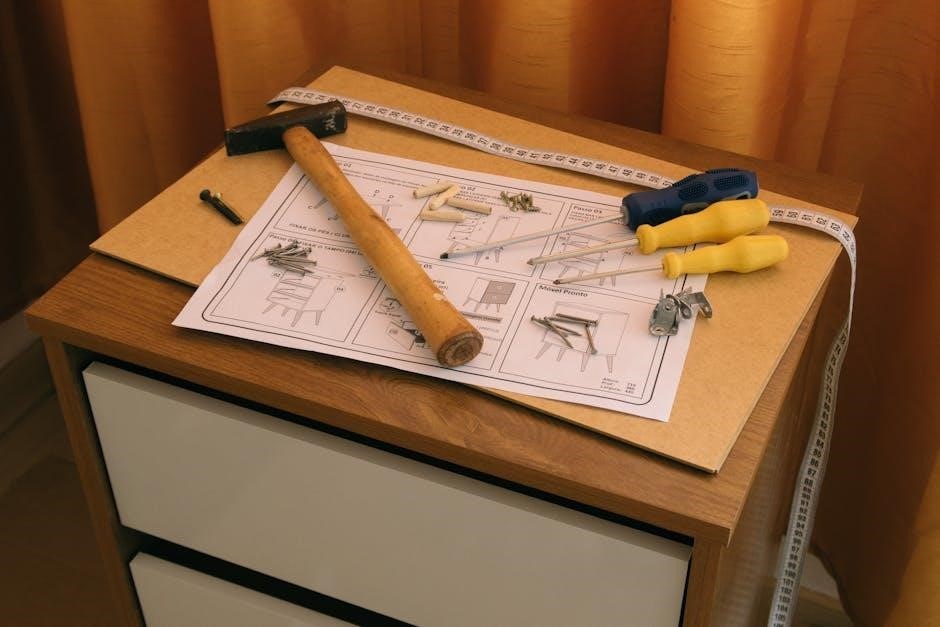
Tools and Preparation
Essential tools include torque wrenches‚ sockets‚ and wheel chocks. Ensure a clean‚ well-lit workspace and wear safety gear like gloves and goggles. Proper preparation is key.
3.1 Essential Tools Needed
To successfully work on the Harley rear wheel assembly‚ gather essential tools such as a torque wrench‚ socket set‚ and wrenches. A wheel chock and jack are crucial for lifting and stabilizing the bike. Additionally‚ a bearing installer and puller may be required for removing and installing bearings. Other necessary items include a screwdriver set‚ pliers‚ and a multimeter for diagnostics. Ensure you have a clean‚ well-organized workspace to avoid misplacing parts. Safety gear like gloves and goggles is mandatory to protect yourself during the process. Refer to the official Harley-Davidson manual for specific tool recommendations tailored to your model. Proper tools ensure accurate and efficient assembly‚ preventing potential damage to components. Always verify torque specifications to avoid over-tightening‚ which can compromise wheel integrity.
3.2 Safety Precautions and Workspace Setup
Before starting‚ ensure a safe working environment by wearing safety glasses and gloves. Position the bike on a level surface using jack stands for stability. Disconnect the battery to prevent accidental startup. Clear the workspace of clutter and ensure good ventilation‚ especially when using chemicals. Use a torque wrench correctly to avoid over-tightening‚ which can damage components. Keep loose clothing and long hair tied back to prevent accidents. Organize tools and parts in a clean‚ dry area to avoid misplacement. Refer to the official Harley-Davidson manual for model-specific safety guidelines. Proper workspace setup and adherence to safety protocols minimize risks and ensure a successful assembly process. Always double-check the bike’s stability before working underneath it.

Assembly Process
The assembly involves systematically fitting components like the hub‚ wheel‚ and brake rotor. Follow the diagram for correct alignment and securement to ensure functionality and safety.
4.1 Initial Steps and Component Inspection
Begin by gathering all necessary components and tools‚ ensuring everything is clean and free from damage. Inspect the hub‚ wheel‚ and brake rotor for any signs of wear or damage. Check bearings for smooth operation and verify the integrity of the sprocket or brake disk. Referencing the exploded diagram‚ identify each part’s correct placement and orientation. Ensure all fasteners and spacers are accounted for and match the parts list. Lubricate moving parts as specified and align components carefully to avoid misassembly. Tighten components incrementally‚ following the torque specifications provided in the service manual. Proper preparation and inspection are critical to ensure a safe and functional rear wheel assembly. Always double-check alignment before proceeding to final tightening.
4.2 Final Assembly and Tightening Procedures
Once all components are properly aligned‚ begin the final assembly by securely attaching the wheel to the hub using the provided hardware. Tighten the axle nut in a star pattern to ensure even pressure‚ following the torque specifications in the service manual. Ensure the brake rotor is properly seated and aligned with the caliper. Tighten all bolts and screws gradually‚ checking alignment frequently. Double-check the sprocket or brake disk for proper fitment and alignment. Refer to the exploded diagram for visual confirmation of correct assembly. Finally‚ inspect all connections for tightness and ensure the rear wheel spins freely without wobbling. Consult the service manual for model-specific torque values and tightening sequences to guarantee safety and optimal performance.
Maintenance Tips
Regularly clean and lubricate moving parts to prevent corrosion and wear. Inspect bearings and brake rotors for damage or excessive wear‚ replacing as needed for optimal performance.
5.1 Cleaning and Lubrication Practices
Cleaning and lubrication are critical for maintaining the Harley rear wheel assembly. Start by removing dirt and grime using a mild detergent and water. Avoid harsh chemicals or abrasive materials that could damage finishes.
Inspect and clean the hub‚ bearings‚ and rotor regularly. Apply high-quality grease to moving parts‚ such as bearings and pivot points‚ to reduce friction and prevent corrosion. Ensure all surfaces are dry before reassembly.
For optimal performance‚ lubricate the rear wheel components every 5‚000 miles or after exposure to water. Use Harley-Davidson-approved products to ensure compatibility and longevity of parts. Finally‚ inspect for any signs of wear or rust and address issues promptly to maintain safety and functionality.
5.2 Regular Inspection and Replacement Guidelines
Regular inspection of the Harley rear wheel assembly is essential to ensure safety and performance. Inspect bearings‚ brake rotors‚ and spokes for wear or damage. Check for rust‚ corrosion‚ or excessive play in the hub.
Replace bearings every 20‚000 to 30‚000 miles or when showing signs of wear. Brake rotors should be replaced if they are warped or worn below minimum thickness. Spokes need tightening if loose and replacing if damaged.
Consult the official Harley-Davidson manual for specific guidelines tailored to your model. Address any issues promptly to prevent further damage. Regular inspections and timely replacements ensure optimal functionality and rider safety. Always follow recommended maintenance schedules for longevity and reliability.
Troubleshooting Common Issues
Common issues include worn bearings‚ warped brake rotors‚ and loose spokes. Diagnose by inspecting for noise‚ vibration‚ or braking inconsistencies. Refer to the diagram for repair guidance.
6.1 Identifying and Addressing Assembly Problems
Identifying assembly issues requires a thorough inspection of the rear wheel components. Common problems include misaligned brake rotors‚ improperly seated bearings‚ and loose hub connections. Start by checking for any visible damage or wear on parts like the rotor‚ bearings‚ and spokes. If the wheel does not spin smoothly‚ bearings may be faulty. Brake rotors that are warped can cause vibration during braking. Consult the diagram to locate each component and ensure proper alignment. Addressing these issues may involve replacing damaged parts or adjusting components for proper fitment. Always refer to the Harley Davidson manual for specific torque values and adjustment procedures to prevent further damage and ensure safety.
6.2 Diagnostic Techniques and Repair Solutions
Diagnostic techniques for the Harley rear wheel assembly involve systematic inspection and testing. Start with a visual examination of the components‚ checking for signs of wear‚ damage‚ or misalignment; Use tools like a torque wrench to ensure all bolts and nuts are properly tightened. Test ride the bike to identify issues like wobbling or braking inconsistencies. Common repair solutions include replacing worn-out bearings‚ aligning the brake rotor‚ and tightening loose spokes. For complex issues‚ refer to the exploded diagram to trace component relationships. Always follow manufacturer guidelines for part replacement and adjustment to restore optimal performance and safety. Regular maintenance can prevent major repairs by addressing minor issues early.

Safety Guidelines
Always wear protective gear like gloves and goggles. Use proper tools and ensure the bike is securely supported. Follow torque specifications and manufacturer instructions carefully.
7.1 Best Practices for Safe Assembly
Ensure a clean‚ well-lit workspace and use jack stands to stabilize the bike. Always consult the manual for torque specifications and proper tool usage. Inspect all components for damage before assembly to prevent mechanical failure. Tighten bolts in a star pattern to avoid warping surfaces. Apply lubricants as specified to moving parts. Double-check brake rotor alignment and bearing installation. Never override factory torque values to prevent component damage. Keep loose clothing and long hair tied back to avoid accidents. Maintain focus and avoid distractions during assembly. If unsure‚ consult a professional mechanic. Finally‚ test ride in a safe‚ open area after completing the assembly to ensure proper function and safety.
7.2 Essential Protective Gear
Wearing the right protective gear is crucial for safety during Harley rear wheel assembly. Always use safety glasses or goggles to protect your eyes from debris. Gloves provide grip and prevent cuts or abrasions. A face mask is recommended when grinding or sanding to avoid inhaling dust. Steel-toe boots protect feet from heavy tools or falling parts. Long sleeves and pants help prevent skin abrasions. If welding‚ wear a welding helmet with a shaded lens. Ensure proper ventilation and consider a respirator when working in dusty environments or with chemicals. Avoid loose jewelry or clothing that could get caught in tools. Keeping protective gear on throughout the process minimizes injury risks and ensures a safe working environment.
Exploded Diagrams
Exploded diagrams provide a detailed visual breakdown of the rear wheel assembly‚ showcasing each component’s position and relationship. They are invaluable for understanding and executing proper maintenance and repairs.
8.1 Understanding and Reading the Diagram
Understanding the exploded diagram requires familiarity with its symbols and layout. Each component is labeled‚ showing its position and connections within the assembly. Start by identifying the main sections‚ such as the hub‚ wheel‚ and brake rotor. Note how these parts interact and the sequence of assembly. The diagram often includes numbered keys corresponding to part numbers‚ which match the parts list. This helps in identifying each piece and its role. Pay attention to arrows indicating assembly direction and torque specifications. Cross-referencing with the parts manual ensures accuracy. Practice visualizing how components fit together before starting physical work; This step is crucial for avoiding errors during assembly or repairs. Regularly reviewing the diagram enhances understanding and improves mechanical skills. It serves as a blueprint for successful project completion. Always refer to official Harley-Davidson manuals for the most accurate and detailed information.
8.2 Utilizing the Diagram for Effective Assembly
Utilizing the exploded diagram ensures a systematic approach to rear wheel assembly. Start by cross-referencing the parts list with the visual representation to confirm all components are present. Identify the hub‚ wheel‚ and brake rotor‚ as these form the core of the assembly. Follow the diagram’s sequence‚ beginning with the hub installation‚ then progressing to the wheel and brake components. Pay attention to torque specifications and alignment markers. Use the diagram to verify proper seating and orientation of bearings and spacers. Double-check each step against the visual guide to avoid misalignment or incorrect part placement. This method minimizes errors and ensures a secure‚ functional assembly. Regularly refer back to the diagram during the process to maintain accuracy and confidence. Proper utilization of the diagram guarantees a professional-grade result‚ whether assembling or repairing the rear wheel.
Customization Options
Customize your Harley rear wheel with performance upgrades like lightweight wheels or enhanced braking systems. Aesthetic modifications include chrome finishes or custom designs for a personalized look.
9.1 Performance Upgrades
Enhance your Harley’s performance with upgraded rear wheel components. Lightweight wheels made from aluminum or carbon fiber reduce unsprung weight‚ improving acceleration and handling. High-performance brake rotors‚ such as drilled or slotted designs‚ offer better heat dissipation and braking efficiency. Upgrading bearings to high-quality‚ low-friction alternatives can smooth operation and extend component life; Additionally‚ installing a performance-driven sprocket or belt drive system optimizes power delivery. These upgrades not only boost performance but also ensure durability and reliability for demanding rides. Always refer to compatibility charts to ensure parts align with your specific model and year. Proper installation using specialized tools is crucial for maintaining safety and optimal performance.
9.2 Aesthetic Modifications
Customize your Harley’s rear wheel assembly to match your unique style. Chrome-plated or anodized wheel rims offer a sleek‚ polished appearance‚ while custom-designed spokes and hubcaps add a personalized touch. For a bold look‚ consider aftermarket wheels with intricate designs or color-matched finishes. Accessory brake rotors with decorative coatings or engraved patterns can enhance visual appeal without compromising performance. Additionally‚ billet aluminum components‚ such as sprocket covers or axle nut covers‚ provide a refined aesthetic. These modifications allow riders to express their individuality while maintaining the bike’s functionality. Ensure all aesthetic upgrades are installed correctly to preserve safety and structural integrity. Consult the diagram for compatibility and proper fitting of decorative parts.

Resources and References
Access official Harley-Davidson manuals‚ exploded diagrams‚ and part lists for detailed guidance. Visit forums like Ronnie’s Parts Lookup for community support and troubleshooting tips. Online retailers like Get Lowered Cycles offer genuine parts and accessories. Always refer to model-specific resources for accuracy and compatibility. Ensure safe and correct assembly by following verified instructions and seeking professional advice when needed. Use these resources to enhance your understanding and ensure a successful project.
10.1 Accessing Official Harley-Davidson Manuals
Official Harley-Davidson manuals are essential for accurate repairs and maintenance. These manuals are available through authorized Harley-Davidson dealerships or online platforms. They include detailed exploded diagrams‚ part lists‚ and step-by-step instructions for rear wheel assembly. Ensure compatibility by selecting manuals specific to your bike model and year. The manuals cover critical procedures‚ such as brake rotor installation and bearing replacement. They also provide safety guidelines and manufacturer specifications for torque and assembly. Accessing these resources ensures adherence to factory standards‚ minimizing errors. For complex tasks‚ refer to the service manual available through Harley-Davidson dealers. Use these official resources to guarantee a precise and safe assembly process.
10.2 Recommended Online Forums and Parts Suppliers
For enthusiasts working on Harley rear wheel assembly‚ online forums and trusted parts suppliers are invaluable. Platforms like Ronnies Parts Lookup and Get Lowered Cycles offer detailed diagrams‚ part lists‚ and compatibility guides. These resources ensure you find the correct components for your specific model. Online forums‚ such as Harley-Davidson dedicated groups‚ provide community support and expert advice. They often share tips and solutions for common issues‚ helping you troubleshoot and complete your assembly efficiently. Additionally‚ official suppliers like Harley-Davidson dealerships offer authentic parts and manuals‚ ensuring quality and compatibility. These resources are essential for DIY enthusiasts and mechanics aiming for a precise and durable rear wheel setup.